
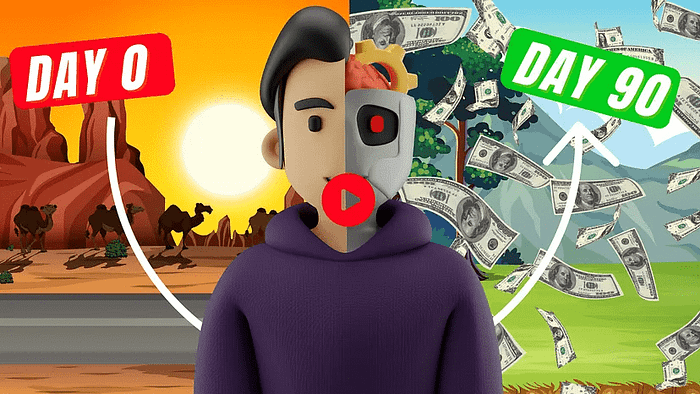
The Best Way to Create Motion Graphics With Claude Code That Generated $300K for 1 Faceless Channel
How Claude Code and Remotion Are Giving Faceless Creators a $300,000 Advantage in 2026
Claude code is rewriting the rules for faceless content creators who want professional-grade motion graphics without expensive software or design skills.
Right now, there is a faceless YouTube channel with nearly 300,000 subscribers and over 100 million total views that has never shown the creator’s face once.
Based on a standard YouTube CPM estimate of $2 to $3 per 1,000 views, that channel has likely generated between $200,000 and $300,000 in ad revenue alone.
The remarkable thing is that the kind of animated visuals driving those numbers can now be built using claude code, a tool that has taken the internet by storm because of how capable and accessible it truly is.
If you have been looking for a way to build a content business with real earning potential, tools like ProfitAgent are already helping beginners step into AI-powered income streams, and this tutorial is going to show you exactly how claude code fits into that bigger picture.
We strongly recommend that you check out our guide on how to take advantage of AI in today’s passive income economy.
Table of Contents
What Claude Code Actually Is and Why Every Creator Is Talking About It
Claude code is a developer tool built by Anthropic, the same company behind the Claude AI model, and it allows you to write, run, and manage code directly inside a coding environment called Visual Studio Code.
Unlike a regular chatbot where you type a question and get a text answer, claude code actually executes code on your computer, building real files, real animations, and real software based on the prompts you give it.
This is not a minor upgrade from what was available before — this is a completely different level of capability that puts professional-grade output in the hands of people who have never written a single line of code in their lives.
The faceless channel mentioned earlier, with its clean animated charts and smooth data visualizations, is using exactly the kind of output that claude code can produce for you in under two minutes with a simple text prompt.
When you combine claude code with a tool called Remotion, which converts React-based code into rendered video files, you get a pipeline that produces broadcast-quality motion graphics from nothing more than a written description.
Creators using AutoClaw as part of their automation workflow are already pairing these AI coding tools with hands-free content systems that publish, distribute, and monetize content without requiring the creator to be present for every step.
The demand for this kind of workflow is growing fast, and the creators who learn it now are going to have a significant head start over everyone who waits.
Everything You Need to Install Before You Can Use Claude Code
Before claude code can do anything for you, there are four things that need to be installed on your computer, and each one plays a specific role in making the whole system work.
The first thing you need is an active Claude account with a paid subscription, because claude code requires API access that is only available to paying users, and this is a non-negotiable requirement for the tool to function.
If you are on the fence about subscribing, consider this — the faceless channel earning $300,000 from 100 million views likely spent a fraction of that on tools, and a monthly Claude subscription is a very small cost relative to the earning potential it unlocks.
Step One — Download and Install Visual Studio Code
Open a browser and search for Visual Studio Code, then go to the official Microsoft website and click the download button for your operating system, whether that is Windows, Mac, or Linux.
Once the file finishes downloading, open it and follow the installer prompts, accepting the terms and clicking through the next and install buttons until the process completes and Visual Studio Code is fully installed on your machine.
Visual Studio Code is the environment where claude code will live, where you will type your prompts, and where the AI will write and execute code on your behalf, so this is the foundation that everything else is built on.
Step Two — Install Node.js
Search for Node.js in a new browser tab, go to the official Node.js website, and click the button that says Get Node.js to find the right installer for your system.
For Windows users, scroll to the Windows installer option and click the download button, then open the downloaded file and click through the installation prompts just like you did with Visual Studio Code.
Node.js is the runtime environment that allows JavaScript and React-based code to execute on your computer, and without it, Remotion and claude code cannot run the animation files they generate.
Step Three — Install Git
Search for git download in your browser, click on the official Git website, select your operating system, and then click the link that says click here to download to get the installer file.
Open the installer and click through all the prompts, accepting the defaults and finishing the installation, because Git handles version control and package management tasks that claude code relies on behind the scenes.
Once all three of these tools are installed alongside your Claude account, your computer has everything it needs to run claude code at full capacity, and that is a setup most professional developers would recognize immediately.
Creators who are serious about building a scalable content business are already using AISystem to manage the full ecosystem, from AI content generation to monetization workflows that bring everything together in one place.
How to Install Claude Code Inside Visual Studio Code
With Visual Studio Code open on your computer, look at the left-hand sidebar and find the icon that represents the Extensions panel, which looks like four small squares with one slightly separated from the group.
Click on that Extensions icon, and in the search bar that appears, type claude code and wait a few seconds for the results to load, then look for the extension labeled Claude Code for VS, which is the official Anthropic extension and is usually the first result in the list.
Click on the extension name, then click the Install button, and make sure the auto update option is checked so that your claude code installation stays current without requiring manual intervention every time an update is released.
After installation, you may see a Windows security prompt asking whether to allow the application through your firewall — click allow so that claude code can communicate with Anthropic’s servers and process your prompts correctly.
Once installed, Visual Studio Code will show a Getting Started with Claude Code panel, and it is worth checking all the available options here, including opening claude code by default, enabling the chat interface, and saving past conversations so the AI can reference previous prompts when you are working on ongoing projects.
The final step is connecting your Claude account to claude code, which you do by right-clicking in the editor area to create a new text file, then clicking on the Claude Code option in the right-hand panel and selecting the Claude AI subscription link that appears.
This opens the Anthropic website and asks you to authorize claude code to access your Claude account — click authorize and within seconds you will see a confirmation message saying you are all set up, at which point you can close that browser tab and return to Visual Studio Code where the chat interface is now fully active and ready to use.
ProfitAgent is worth exploring at this stage because it is designed specifically for beginners who want to monetize AI tools like claude code without needing a technical background or prior experience with coding environments.
Installing the Remotion Skill That Turns Claude Code Into a Motion Graphics Engine
Claude code becomes a motion graphics powerhouse when you add the Remotion skill to it, and the installation happens entirely inside the Visual Studio Code terminal with a single command.
Go to the top menu bar in Visual Studio Code, click Terminal, and then select New Terminal from the dropdown, which opens a command-line panel at the bottom of your screen where you can type instructions directly to your computer.
In the terminal, type the following command exactly as shown: npx skills add –dev/skills and then press Enter on your keyboard to execute it.
Some computers will encounter an execution policy error at this point, particularly on Windows, and the fix is to open Windows PowerShell separately by searching for it in the Windows search bar, then typing Get-ExecutionPolicy -List and pressing Enter, followed by a second command to update the policy settings, both of which can be found in the original resource linked to this tutorial.
After running those PowerShell commands and restarting Visual Studio Code, open a new terminal again and repeat the npx skills command, and this time it should proceed without error, asking you to confirm by typing Y and pressing Enter.
The installer will then ask you to choose an installation scope — select Global rather than Project so that Remotion is available across all future projects and not just the current one — and when asked to choose an installation method, select Symlink, which is the recommended option for performance and compatibility.
Confirm the final installation prompts by pressing Enter to accept, and within a short time the terminal will show a completion message confirming that claude code now has the Remotion skill installed and is ready to generate motion graphics on command.
This is genuinely the most technically demanding part of the entire setup, and once it is done, everything else from this point forward is simply writing prompts and watching the AI build the animation for you.
AutoClaw handles the kind of repetitive workflow automation that pairs perfectly with this setup, allowing you to generate motion graphics with claude code and then feed them into a content pipeline that runs largely on its own.
Creating Your First Motion Graphic With Claude Code
With the setup complete, the chat panel on the right side of Visual Studio Code is where all the creative work happens, and it works exactly like typing a message to any AI chatbot except that claude code will actually build what you describe.
For a first test, try a prompt like this: use the remotion skill to generate a motion graphic where a chart rises upward and next to it a number counts from 0% to 78% with a smooth animation and a glow effect — this is a simple enough prompt to produce clean results quickly while demonstrating exactly what claude code can do.
Claude code will begin processing the prompt and will ask for permission to run certain commands on your computer, which is normal behavior since the tool is writing and executing code on your behalf — click allow or type yes to approve each command as it comes up, and note that this only happens during the first session because permissions are saved after the initial setup.
The generation process typically takes between 30 seconds and two minutes depending on the complexity of the prompt, and when it finishes, claude code will provide a local web address that you can copy and paste into your browser to open the Remotion preview editor.
Inside the Remotion editor, which looks and functions like a basic video editing timeline, you can press play to watch the motion graphic you just created — in the case of the chart animation, you will see smooth upward movement with a glowing percentage counter rising to 78%, rendered cleanly with no rough edges or visual artifacts.
The faceless channel with 100 million views is producing ranking content — top 10 lists, most followed accounts, richest people in the world — and that kind of content is exactly what a more detailed claude code prompt can generate, complete with animated bars, scrolling names, and dynamic number counters that look like they came out of a professional motion graphics studio.
To render the final file, click the Render button inside the Remotion editor, choose your preferred format and frame rate, and the video will export directly to your computer ready to be imported into any editing software and placed into your content.
AISystem gives you the complete infrastructure to take that rendered file and deploy it as part of a monetized content strategy, connecting the creative output of claude code to the business side of building a faceless channel.
The Real Business Case Behind Claude Code Motion Graphics
The channel referenced throughout this tutorial has posted approximately 1,500 pieces of content, and it is almost certain that AI is involved in the production process given the volume and the visual consistency across every upload.
At 100 million views and a $2 to $3 CPM, the revenue is somewhere between $200,000 and $300,000, and that number comes entirely from ranking-style content built around animated data visualizations — exactly the type of output that claude code and Remotion can produce in minutes.
Claude code itself uses ReactJS under the hood to build the graphics, and Remotion acts as the bridge that converts that web-based code into a proper video file, which means the quality ceiling is extremely high because the same technology that powers modern websites is being used to build the animations.
Every creator who learns this workflow in 2026 is gaining access to a production capability that was previously limited to teams with dedicated motion designers, After Effects licenses, and significant post-production budgets.
ProfitAgent is the entry point for creators who want to start generating income from AI tools while they build out their content systems, and it works alongside the kind of workflow this tutorial teaches rather than competing with it.
AutoClaw handles the automation layer that takes your claude code output and distributes it at scale, removing the manual steps between content creation and content publication so that the system runs continuously without constant input.
AISystem ties everything together as a full business ecosystem, giving you the tools, the training, and the infrastructure to build a faceless content operation that generates consistent income using claude code as the creative engine at its core.
Final Thoughts on Claude Code as a Motion Graphics Tool for Faceless Channels
Claude code has moved from being a niche developer tool to a serious content creation platform in a very short amount of time, and the creators who recognized that early are already seeing the results in their subscriber counts and revenue numbers.
The setup process — Visual Studio Code, Node.js, Git, and the Remotion skill — takes less than an hour from start to finish, and once it is done, every motion graphic you need for a faceless channel is just a prompt away.
The key to getting quality output is writing detailed prompts that describe exactly what you want to see — the more specific the description of the animation, the more precisely claude code will build it, and Claude itself can help you write those prompts if you are unsure where to start.
This is a workflow that scales, that costs very little to run, and that produces output comparable to what professional motion graphics teams were charging thousands of dollars for just a few years ago.
Start with ProfitAgent to monetize your AI knowledge from day one, use AutoClaw to automate the distribution of everything you create, and build the full operation with AISystem so that your faceless channel has a real business foundation underneath it.
Claude code is the creative tool, but the system around it is what turns that creativity into consistent, compounding income.
We strongly recommend that you check out our guide on how to take advantage of AI in today’s passive income economy.