
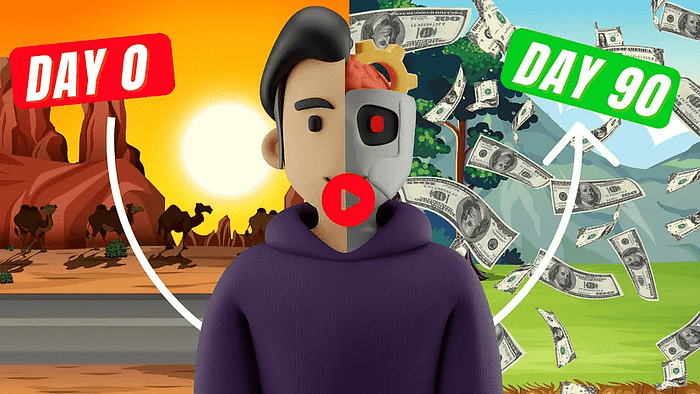
The Automation Shift Every Creator Needs to Know About
AI automation is no longer a luxury reserved for tech companies with large engineering teams — it is a practical, accessible skill that any creator, freelancer, or business owner can master starting today.
The tools available right now make it possible to set up systems that run entirely on their own, completing real, meaningful work while you focus on the things that actually require your human creativity and judgment.
flipitai is one of the platforms leading this conversation for creators, helping people understand how to combine AI tools with smart workflows to build sustainable, scalable output — and that philosophy is exactly what this article is built around.
What follows is a complete, practical walkthrough of how to build a three-step automation using ChatGPT and Zapier, so that tasks like generating email subject lines, writing summaries, or processing content files happen automatically every single time a new file lands in a folder on your computer.
By the time you finish reading this, you will have a clear mental picture of the entire process, understand the core concepts behind any automation you want to build, and be ready to apply this to hundreds of use cases far beyond the example shown here.
Table of Contents
Why AI Automation Changes Everything for Creators and Professionals
Before diving into the steps, it is worth understanding why automation built around AI tools like ChatGPT is such a significant shift from the way most people currently work.
Most people think of AI as something they interact with manually — they open a browser tab, type a prompt, read the output, and copy it somewhere useful.
That workflow is already powerful, but it still requires you to show up, remember to do it, and manually trigger every single result you want.
Automation removes that requirement entirely, so instead of you going to the AI, the AI comes to the work the moment it needs to happen.
What this means in practice is that once you build even one automation, you are essentially hiring a tireless digital assistant who never forgets, never gets distracted, and never charges overtime — and tools like flipitai are designed to help creators understand exactly how to put these systems together without needing any coding background whatsoever.
The example used throughout this article is email subject line generation, but the exact same three-step structure applies to generating social media captions, summarising documents, reformatting data, responding to form submissions, and literally thousands of other use cases once you understand the pattern.
Step 1: Setting Up Your Automation Trigger on Zapier
Understanding What a Trigger Actually Does
The first concept you need to fully understand before building any automation is the trigger, and the best way to think about it is as the first domino in a long line of dominoes standing perfectly upright on a table.
Nothing happens until that first domino falls, and in the world of automation, your trigger is that first domino — it is the specific event that tells the entire system that it is time to start working.
Head over to Zapier.com, which is a no-code automation platform that connects over 5,000 apps together without requiring you to write a single line of code, and create a free account if you do not already have one.
Once you are inside your Zapier dashboard, you will notice that every individual automation is referred to as a “Zap,” and the platform tracks how many Zaps you run in a given billing period, so it is worth being aware that the first several weeks come with free usage before a paid tier kicks in.
To create a new automation, click the “Create Zap” button, which opens a clean, step-by-step builder interface that walks you from the trigger down through every action you want the system to perform — and the visual layout is intentionally top-to-bottom, which is the exact mental model to use when building any automation with this tool.
Choosing Dropbox as Your Trigger App
For this particular automation, the trigger is going to be a new file appearing inside a specific folder on your computer, and the app being used to make that happen is Dropbox, although the exact same logic applies if you prefer Google Drive or any of the other thousands of supported apps.
Inside Dropbox, create a new parent folder — call it something like “YouTube Test” or whatever naming convention makes sense for your workflow — and inside that folder, create two subfolders: one called “Drop Zone Emails” and one called “Subject Lines.”
The Drop Zone Emails folder is where you will drop the raw email files that need subject lines generated, and the Subject Lines folder is where the automation will save the finished output automatically — so you are essentially building a clean input-and-output filing system that runs entirely on its own once it is switched on.
Back inside Zapier, search for Dropbox in the app selection panel, choose it as your trigger app, and then select “New File in Folder” as the trigger event, which means the automation will fire every single time a new file is detected inside the folder you specify.
Connect your Dropbox account, navigate to the correct folder path — in this case the Drop Zone Emails subfolder — and click continue, at which point Zapier will prompt you to test the trigger by dropping a sample file into the folder so it can confirm the connection is working correctly.
Drop a simple text file containing a sample email into the Drop Zone Emails folder, run the test inside Zapier, and within a few seconds you should see Zapier successfully detect the file and display its full contents — including all the text inside — confirming that the trigger is live and reading data correctly.
This is a crucial moment because it means the system now has access to the actual content of whatever file you drop into that folder, which is the data that will be fed into ChatGPT in the very next step to generate the output you need.
If you are building automations to support your creative business and want a community and platform that understands this workflow, flipitai is worth exploring as a resource that connects creators with tools, strategies, and AI-powered systems built specifically for content-driven work.
Step 2: Adding ChatGPT as Your First Action
What an Action Is and How It Differs From a Trigger
Now that the trigger is set up and tested, the second major concept to understand is the action, which is everything that happens after the first domino falls.
Unlike the trigger, which can only be one thing, you can stack as many actions as you want after a trigger fires — so a single file drop into a folder could theoretically trigger ten different AI tools, save results to five different apps, send an email notification, update a spreadsheet, and post to a Slack channel all at once without you touching anything.
For this automation, the first action is a conversation with ChatGPT, which is accessed through the OpenAI integration inside Zapier — simply search for “ChatGPT” in the action app field and select it from the list.
Writing the Prompt That Powers the Automation
Choose “Conversation” as the event type, connect your OpenAI account using your API credentials, and then navigate to the model selection field where you will want to choose GPT-4 for the highest quality output, especially when the task involves nuanced writing like email marketing copy.
The most important field on this entire screen is the “User Message” field, because this is your prompt — it is the exact instruction you are sending to ChatGPT every single time the automation runs, and crafting this well is what separates a mediocre automation from one that produces genuinely useful, professional-grade results.
A strong prompt for this use case would look something like: “Generate five compelling email subject lines for a YouTube announcement targeting AI enthusiasts,” followed by a new line that pulls in the actual email content from the previous trigger step using Zapier’s dynamic data feature.
To insert the file content dynamically, simply click inside the User Message field, type something like “Email content:” and then use Zapier’s variable picker to select the file text from Step 1 — this is where the automation becomes genuinely intelligent, because it is not just running a static prompt but actually reading the specific email you dropped into the folder and generating subject lines tailored to that exact content every single time.
Click continue, run the test action, and within a few seconds ChatGPT will process the prompt and return five subject lines directly inside Zapier’s interface — you can scroll down to see the assistant response and confirm that the output matches what you were expecting before moving on.
This is also where the creative possibilities start to expand rapidly, because the same structure works whether you are generating social captions, reformatting blog intros, summarising meeting notes, or creating product descriptions — and flipitai provides creators with prompt templates and workflow ideas that slot directly into automation setups like this one.
Step 3: Saving the ChatGPT Output to a Dropbox File Automatically
Why Saving the Output Matters as Much as Generating It
Generating great AI output is only half the job — the other half is making sure that output lands somewhere useful and accessible without requiring you to manually copy and paste anything, which would defeat the entire purpose of building the automation in the first place.
The second and final action in this three-step automation is creating a new text file inside the Subject Lines folder in Dropbox, and this is done by adding another action inside Zapier, selecting Dropbox as the app, and choosing “Create Text File” as the event.
Connect the same Dropbox account as before, navigate to the Subject Lines subfolder in your folder path, and then fill in two critical fields: the file name and the file content.
For the file name, use a dynamic combination of the original file name from Step 1 — pulled using Zapier’s variable picker — followed by a suffix like “_Auto_Subject” so that every output file is clearly labeled as automatically generated and you can instantly tell which source email it corresponds to when you open the folder later.
For the file content, navigate to Step 2 in the variable picker and look for the “Assistant Response Message” field — this is the full ChatGPT output containing your five subject lines, and selecting it here means that every time the automation runs, the complete AI-generated response gets written directly into a new file and saved to your Dropbox folder without any manual involvement.
Run the test, confirm that a new file appears in the Subject Lines folder with the correct name and the correct content inside it, and then click Publish inside Zapier to make the automation live and active around the clock.
From this point forward, every single time a text file is dropped into the Drop Zone Emails folder — whether that happens at nine in the morning or two in the morning — the automation will detect it, send the content to ChatGPT with your custom prompt, receive five subject lines back, and save them to a clearly labeled file in the Subject Lines folder, all within roughly two minutes and with zero effort required from you.
What to Build Next With This Automation Foundation
Expanding Beyond Email Subject Lines
The three-step structure you just built — trigger, AI action, save output — is the core pattern behind hundreds of different automations, and once you understand it at this level, the only limit is how creatively you can apply it to the repetitive tasks in your own workflow.
Content creators can use this exact setup to automatically generate blog post outlines whenever a new transcript file is dropped into a folder, or to create social media captions from rough notes, or to reformat interview answers into structured article sections — all without opening a browser or typing a prompt manually.
Business owners can use the same pattern to summarise customer feedback files, generate proposal drafts from intake forms, or create weekly report summaries from data exports, with every result saved to an organised folder structure that builds itself over time.
The key insight is that automation compounds — each workflow you set up continues running forever after a single one-time setup, which means every hour you invest in building these systems returns value continuously rather than once, and flipitai is a platform built around exactly this kind of creator leverage, helping individuals build systems that scale their output without scaling their working hours.
If you are a flipper or reseller looking to apply automation to your own product workflow, flipitai has a dedicated space built specifically for that use case, with tools and resources designed around the unique demands of flipping and resale businesses.
Conclusion: One Setup, Infinite Returns
AI automation is one of the highest-leverage skills available to any creator, freelancer, or business owner right now, and the three-step framework covered in this article — a file drop trigger, a ChatGPT action with a dynamic prompt, and a Dropbox save action — is both simple enough to build in under thirty minutes and powerful enough to replace hours of manual work every single week.
The automation runs around the clock, processes every file you feed it with consistent quality, never forgets a step, and saves the results exactly where you need them — and because Zapier connects over five thousand apps, the same structure can be adapted to virtually any tool or platform already in your workflow.
Start with one automation, test it thoroughly, watch it run on its own, and then use that momentum to build the next one — because the creators who move fastest in the coming years will be the ones who treat automation not as a technical curiosity but as a core part of how they work every single day.
For ongoing strategies, tools, and AI-powered workflow ideas built specifically for creators, flipitai is the place to start — and for flippers looking for their own dedicated space inside the platform, flipitai is ready and waiting.
We strongly recommend that you check out our guide on how to take advantage of AI in today’s passive income economy.