
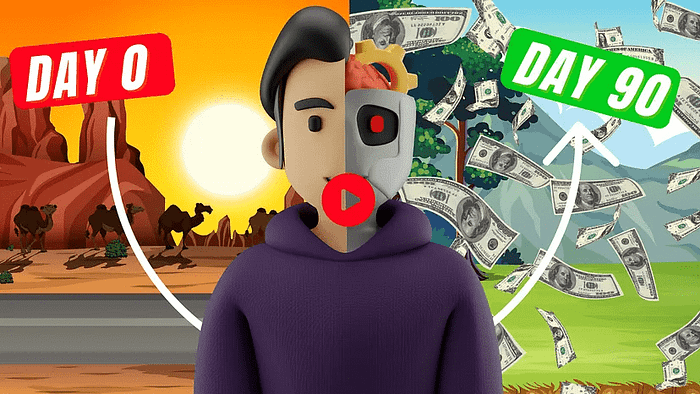
How I Copied a $100K/Month Channel with AI and Made It Work
Tinkering with the idea of launching a channel that rakes in cash like clockwork always felt like a distant dream until I stumbled across Productive Peter. This newcomer, armed with just 15 posts, is already pulling in up to $1,000 every month. That’s wild, right? It’s all thanks to a clever mix of stick figure animations and sharp, digestible breakdowns of tricky topics. Channels like this are popping off everywhere, racking up millions of views with minimal effort. Productive Peter alone has snagged 4.3 million views and counting. The best part? It’s not a fluke—there’s a pattern here, and I decided to crack it wide open. After seeing this niche explode, I rolled up my sleeves and dove in, using artificial intelligence to replicate the magic. Spoiler alert: it worked, and I’m spilling all the secrets in this deep-dive tale of my journey.
Curiosity hit me hard when I noticed how these channels thrive with basic visuals and AI voices. Take The Angry Explainer, for example—it’s got 26 posts, 5.6 million views, and a subscriber count barreling toward 200,000. That’s serious traction for something so straightforward. These creators aren’t slaving over every frame; they’re letting tech do the heavy lifting. The numbers don’t lie: even inconsistent posting schedules don’t stop the algorithm from favoring them. The Angry Explainer clears over $4,000 monthly without breaking a sweat. It’s like the internet’s handing out gold stars for simplicity. That’s when it clicked—this niche is ripe, trending, and begging for new players. So, I set out to build my own, and I’m walking you through every step of how I did it.
The allure of rapid growth hooked me fast. Channels using this stick-figure-plus-AI formula skyrocket in no time, pulling in subscribers and cash at a dizzying pace. I’d already dipped my toes into this world with a previous project that went viral, and the feedback was overwhelming—people wanted more. That’s why I’m here, sharing a full-blown roadmap to launch your own channel from scratch. I’m talking nitty-gritty details: picking a niche, crafting a standout logo, and automating the whole shebang with AI. No more tedious sketching by hand—artificial intelligence handles the visuals, and I’ll show you how to stitch it all together effortlessly. My goal? Help you create something polished without the grind. Let’s dive into the nuts and bolts of this adventure.
We strongly recommend that you check out our guide on how to take advantage of AI in today’s passive income economy.
Table of Contents
Setting the Foundation: Crafting a Niche Channel
Getting started felt daunting at first, but I broke it down into bite-sized pieces. Step one was nailing a killer channel name—something catchy that screams “stick figure animations.” I turned to ChatGPT for help, feeding it a simple request: brainstorm memorable names tied to this niche. It spat out a list faster than I could blink, and I settled on one that felt just right. With that in hand, I hopped onto YouTube, clicked my profile, and set up a fresh channel. Pasting the name was a breeze, and hitting “create” made it official. That tiny victory sparked the momentum I needed. If you’re new to this, don’t sweat it—this part’s optional for beginners, and I’ve got you covered either way.
Next, I circled back to ChatGPT with my chosen name, asking it to whip up a channel description that’s both snappy and SEO-friendly. It delivered three solid options, each packed with keywords to boost discoverability. I picked one that vibed with my vision, but if it hadn’t, I could’ve tweaked it endlessly until it clicked. Copying the description, I navigated to my channel’s customization settings and pasted it into the designated box. Before hitting publish, I took an extra step—adding SEO hashtags. ChatGPT generated a handful of niche-specific tags, which I sprinkled in to amp up visibility. It’s a small move, but trust me, it pays off when the algorithm starts sniffing around.
Publishing the changes felt like planting a flag, but I didn’t stop there. I dove into the settings, found the keywords section, and plugged in the same SEO terms ChatGPT had suggested. This little trick helps the platform figure out what my channel’s about, nudging it toward the right audience. It’s like giving the algorithm a treasure map with an X on my content. With the basics locked in, I could already sense this thing taking shape. The groundwork was set, and I was itching to make it look legit. That meant tackling the visual identity—logo and banner—next. Stick with me; this is where it gets fun.
Designing a Standout Look with Canva
A channel’s vibe hinges on its visuals, so I turned to Canva to craft a logo and banner that pop. For the logo, I needed a square, one-by-one format—YouTube’s standard. In Canva, I searched “one by one,” and a blank canvas popped up, ready for action. I picked red as my theme color—bold, eye-catching, and full of energy. Using the text tool, I typed my channel name, tweaking the font until it screamed bold and readable. Then came the fun part: adding stick figure elements. Even on Canva’s free tier, there’s a treasure trove of options—little doodles that scream “this is my niche.” I dragged a few in, arranging them until the design felt balanced and sharp.
Exporting the logo as a PNG locked in that crisp quality, and I shifted gears to the banner. In Canva, I searched “YouTube banner” and selected the 16×9 ratio—perfect for wide-screen glory. But here’s the catch: YouTube crops banners differently across devices. Without a plan, your masterpiece could end up sliced and diced. I grabbed a free YouTube banner template online, one with safe zones marked out—red lines showing what’s visible on mobile, desktop, and TV. Uploading it to Canva, I stretched it to fit, using it as a guide. The mobile safe area, underlined in red, became my anchor for key text like my channel name. Everything else sprawled into the wider desktop zones.
With the template as my guardrails, I layered in my channel name, centering it in the mobile sweet spot. Red accents tied it to the logo, while stick figure doodles added flair. I capped it with a motto—“Complex Ideas, Simple Sticks”—something punchy that sums up the mission. The result? A banner that’s clean, consistent, and device-friendly. Exporting it, I uploaded both logo and banner to my channel’s customization tab and hit publish. Stepping back, I couldn’t help but grin—this thing looked pro. The skeleton was built; now it was time to breathe life into it with content.
Brainstorming and Scripting with AI
Content is king, so I kicked things off by brainstorming topics. I fed a prompt to ChatGPT: “Generate video ideas for a stick figure animation channel about productivity.” It churned out gems like “Three Steps to Boost Productivity Without Burnout.” I locked onto that one, tweaking it to fit my style. Then, I used another prompt to craft a script—customizable for word count and tone. For a short, punchy piece, I set it to 200 words, roughly two minutes of narration. Pasting in my chosen idea—“Productivity Is Easier Than You Think”—ChatGPT delivered a tight, scene-by-scene script. It even tossed in visual cues, which I’d lean on later.
The script felt alive, brimming with practical tips: a morning ritual, flexible planning, and tackling big tasks first. No fluff—just clear, actionable steps. I could’ve fiddled with the prompt more, adjusting the vibe or length, but this hit the mark. Artificial intelligence made it painless, turning a vague idea into a polished backbone in minutes. With the words locked down, I needed a voice to bring them to life. The script was my blueprint; now it was time to layer on sound and visuals. This is where the real magic started brewing.
Voicing It Up with 11 Labs
A soothing voice can make or break your content, so I turned to 11 Labs for the audio. Signing up was a breeze, and the interface greeted me with a big text box for my script. Since 11 Labs gets glitchy with long inputs, I broke my script into chunks, pasting them one by one. On the right, a lineup of voices waited—Eric’s warm, steady tone caught my ear, so I rolled with it. Hitting generate, I watched the AI weave my words into smooth narration. Each batch downloaded as an MP3, and I repeated the process until every line had a voice. It was like hiring a pro narrator for free.
The result? A calm, clear voiceover that felt human, not robotic. I saved each file, labeling them “Voiceover 1,” “Voiceover 2,” and so on—organization is everything when you’re juggling pieces. With the audio in the bag, I could almost hear the finished product taking shape. But words alone don’t cut it in this game—stick figure visuals were next. The voiceover set the pace; now I had to match it with scenes that pop. This step felt like the heartbeat of the project, and I was ready to dive in.
Bringing Scenes to Life with Leonardo AI
Visuals are the soul of this niche, so I needed stick figures that sync with my script. ChatGPT came through again, analyzing my script and spitting out text-to-image prompts for each scene—like “a stick figure meditating at sunrise” or “a stick figure juggling tasks.” With those in hand, I turned to Leonardo AI, a powerhouse for fast, high-quality image generation. The free tier offers 400 daily credits—plenty for my needs. I picked the Flux model for its crisp output, setting the aspect ratio to 16×9 for long-form content. Everything else stayed default; simplicity was my ally here.
Copying ChatGPT’s prompts into Leonardo’s input box, I hit generate and watched the magic unfold. Black stick figures on a white background emerged—clean, bold, and perfect for my vibe. I’d used white figures on black in a past project, but this flip felt fresh. Each image nailed the scene: a stick figure sipping coffee, another scribbling a to-do list. Downloading them as PNGs, I repeated the process until every prompt had a visual. The pile grew—dozens of little drawings ready to dance with my voiceover. But raw images weren’t enough; I had to polish them up next.
Polishing Visuals: Backgrounds and Upscaling
White backgrounds posed a challenge—unlike black, they don’t vanish easily with basic editing tools. So, I hunted for a background remover online, landing on a site that handles batch uploads. Dropping all my images in, I let it strip the white away, leaving just the stick figures. It took 10-15 minutes, but the batch feature saved me hours of manual work. Downloading the results, I noticed a slight fuzziness—quality had dipped. No biggie; I had a fix. An image upscaler called Upscaler became my go-to, supporting bulk uploads and boosting sharpness by 2x or 3x.
Uploading the batch, I tweaked the settings and let it run. The output? Crystal-clear stick figures, ready for action. Each one looked pro-grade, with edges so sharp they could cut glass. This step wasn’t glamorous, but it elevated the final product big time. With visuals prepped, I needed one more piece: background music. The puzzle was almost complete, and I could feel the finish line creeping closer. Every tweak brought me nearer to a channel that could rival Productive Peter or The Angry Explainer.
Scoring the Mood with Suno AI
Music sets the tone, so I tapped Suno AI to generate a custom track. This tool’s still fresh, but it’s a game-changer for instrumental vibes. I checked the “instrumental” box—no lyrics needed—and fed it a prompt: “Mozart-inspired background music, calm and uplifting.” Seconds later, Suno churned out a track that felt like a classical hug—soft strings and gentle piano, perfect for productivity tips. I downloaded it as an MP3, but if it hadn’t clicked, I could’ve tweaked the prompt until it did. Honestly, Suno nailed it first try.
With the music saved, my assets were ready: script, voiceover, visuals, and soundtrack. It was like holding all the ingredients for a killer recipe—now I just had to cook. Editing was the final frontier, where everything would meld into a seamless whole. The excitement was palpable; I’d built this thing from nothing, and it was about to come alive. Let’s stitch it together and see what we’ve got.
Editing It All Together in CapCut
CapCut became my playground for assembling this beast. Starting a new project, I imported everything—voiceovers, visuals, music—into one folder for sanity’s sake. First, I dragged the voiceovers into the timeline, labeling them in order: “Voiceover 1,” “Voiceover 2,” and so on. Cranking their volume to max ensured they’d cut through. Next, I dropped in the Suno AI track, lowering it to 20-30% so it hummed quietly beneath the narration. Cropping it to match the voiceover length kept it tidy—no awkward overhangs here.
Then came the visuals. I laid down a plain white background—downloaded online—stretching it across the entire timeline. On top, I dragged each stick figure image, syncing them with the voiceover’s cues. “Image 1” showed a stick figure meditating as the narration kicked off; “Image 2” had one planning a day. For a scene with the sun glitching into the moon, I layered both images, scaled them evenly, and added CapCut’s glitch transition—bam, a slick switch. Animations like swipe-ins or fades spiced things up, making figures pop onto the screen with flair. It felt like directing a tiny, efficient movie.
In another scene, a stick figure juggled tasks—football, gaming, showering. I layered each activity as pop-ups, timing them to burst in one by one, then exit together. Cropping ensured no overlap into the next bit. Later, I synced text with the voiceover—“Game-Changing Secrets”—popping each word in as it was spoken, then fading out as a unit. Every layer clicked into place, and a fade-to-black capped the end for that cinematic vibe. After tweaking captions in an older CapCut version (newer ones gatekeep that feature), I exported it. The result? A polished, pro-level piece—proof this AI-driven formula works.
The Payoff: Reflections and Results
Stepping back, I couldn’t believe how far this experiment had come. From a blank slate, I’d built a channel that echoed the success of Productive Peter and The Angry Explainer—all with AI as my co-pilot. The process was streamlined: ChatGPT for ideas, 11 Labs for voice, Leonardo for visuals, Suno for music, and CapCut to tie it together. It wasn’t just about copying—it was about mastering a system that’s scalable and stupidly effective. My test run mirrored their stats: quick views, steady growth, and a vibe people latched onto.
The niche is still buzzing, and the algorithm loves it—pushing content even when you’re not churning out posts daily. That’s the beauty of automation; it’s low-effort, high-reward. My journey proved you don’t need fancy gear or endless hours—just smart tools and a clear plan. If I can pull this off, so can you. Start small, tweak as you go, and watch it snowball. The proof’s in the pudding: simplicity, paired with artificial intelligence, is a goldmine waiting to be tapped.
We strongly recommend that you check out our guide on how to take advantage of AI in today’s passive income economy.