
Step-by-Step: Setting Up Your FlipitAI Creator Account
Getting your FlipitAI creator setup right from day one is the single most powerful move you can make for your blog or website in a world where Google keeps pulling the rug from under content creators everywhere.
Picture this — you have spent months crafting blog posts, landing pages, and content that once brought in thousands of daily readers.
Then an algorithm update hits, and almost overnight, your traffic drops by half, your ad revenue shrinks, and the content you worked so hard on sits quietly collecting digital dust.
That painful situation is happening to creators across every niche right now, and it is costing real people real money every single day.
But here is the good news — a smart platform called FlipitAI is giving creators a fresh way to fight back against traffic loss without burning through an entire marketing budget.
With its AI-powered user-generated content system, creators can now post a small bounty and watch real social media content creators drive genuine organic traffic straight back to their blogs and landing pages.
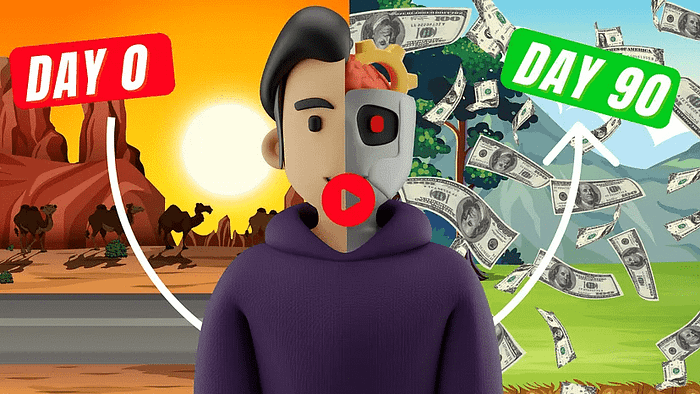
The numbers are almost hard to believe at first glance — for as little as $100, a creator can potentially attract up to 200,000 organic views to their content using the platform.
That is the kind of return that used to require a full-time marketing team, but it is now available to any creator willing to complete their FlipitAI creator setup and follow the steps laid out in this guide.
Table of Contents
How to Register Your FlipitAI Creator Account and Step Into Your Dashboard
Step 1 — Registering as a Creator
The very first thing you need to do when starting your FlipitAI creator setup is open your web browser and type flipitai.io into the address bar at the top of your screen.
Once the page loads, you will land on a clean and modern homepage that immediately gives you a clear sense of what the platform is all about and the kind of results creators are already getting.
After clicking the first link on the homepage, you will be directed to the authentication page — think of this as the front door of the entire FlipitAI platform.
At the top of this page, you will see two clearly labeled options — one that says “I’m a Creator” and another that says “I’m a Flipper.”
Since you are here to build your creator account, go ahead and click the button that says “I’m a Creator” to begin the registration process on FlipitAI.
With the creator option selected, the full registration form will now appear on your screen, and your FlipitAI creator setup requires you to click the “Register” button and begin filling in all the required fields with accurate information.
These fields will ask for your full name, your email address, a strong password, and any other profile details that help identify you as a creator on the platform.
Take your time here because everything you enter will appear on your public creator profile, which is what flippers will see when they browse available bounties on FlipitAI.
One very important detail that many new users skip over is the profile picture upload field — and skipping it is a mistake you want to avoid.
Uploading a clear and professional-looking profile photo helps build immediate trust with flippers who will see your bounty listings and decide whether to apply for them.
A real face, a professional headshot, or a clean and recognizable brand logo all work well here because they signal to flippers that you are a serious creator worth working with on FlipitAI.
Think of your profile picture as your handshake — it is the first thing a flipper notices before they even read a single word of your bounty description.
Once all the required fields are filled in and your profile picture is uploaded, scroll down to find the terms and conditions checkbox near the bottom of the registration form.
Read through the terms to understand how the platform operates, then check the box to confirm your agreement before moving forward with your FlipitAI creator setup.
After checking the box, look for the big green button labeled “Register as Creator” and click it to officially create your account inside the FlipitAI system.
The moment you click that green button, the platform automatically redirects you straight into your creator dashboard without any delay or extra steps.
You are now officially inside FlipitAI, and your creator dashboard is the command center where all your activity as a creator will take place from this point forward.
The dashboard is designed to be simple and intuitive even for someone who has never used a content promotion platform before, so do not feel overwhelmed when you first land on it.
On the left-hand side of the screen, you will see a clean sidebar navigation with clearly labeled buttons that each lead to a different section of the platform.
Take a few moments to look around and get familiar with the layout before moving forward, because understanding where everything lives inside FlipitAI will make the rest of your FlipitAI creator setup process much smoother and faster.
Each button in the sidebar is your gateway to a different function — from managing bounties to tracking performance — and you will be using several of them during the steps ahead.
Think of the sidebar as your personal map and the dashboard as your base of operations inside FlipitAI, where every campaign you run will begin and end.
The cleaner and more complete your profile is at this stage, the more professional your bounties will appear to flippers browsing the platform for opportunities that match their skills and niche.
Your FlipitAI creator setup is off to a strong start — now it is time to add fuel to the engine by funding your creator wallet.
How to Fund Your Wallet and Create Your First Bounty on FlipitAI
Step 2 — Adding Funds to Your Creator Wallet
Now that your account is live and you are inside the dashboard, the next phase of your FlipitAI creator setup is adding money to your creator wallet so you can start funding bounties for flippers to take on.
To do this, look at the left-hand sidebar and find the button labeled “Wallet,” then click on it to be taken to your personal wallet page where your current balance is displayed.
Inside the wallet section, you will see a bright blue button labeled “Add Funds” — click that button and a secure payment form will appear on your screen.
This is where you enter your card details, including your card number, expiry date, and security code, along with the exact amount you want to deposit into your FlipitAI creator wallet.
The payment system is built to be straightforward and secure, so you can add funds with confidence knowing that your financial information is handled safely on FlipitAI.
When deciding how much to deposit, keep in mind that the minimum bounty amount on the platform is $100, which means you need at least $100 in your wallet before you can post your first live bounty.
If you plan to run multiple bounties at once or want the flexibility to scale your campaigns quickly, consider adding a larger amount upfront so you are never slowed down by a low balance during your FlipitAI creator setup journey.
The $100 minimum is actually one of the most accessible entry points in digital content marketing when you consider that creators have reported receiving up to 200,000 organic views from a single bounty campaign on FlipitAI.
Step 3 — Creating Your First Bounty
With your wallet funded and your balance showing a positive amount, head back to the left-hand sidebar inside your FlipitAI creator dashboard and click the very first button labeled “Bounties.”
You will be taken to the bounties page, which is the heart of the entire creator experience on the platform and where all your active, completed, and pending campaigns will live.
At the top of the bounties page, you will notice two important buttons sitting side by side — the first says “Create Bounty” and the second says “Analyze Brand.”
Both serve a unique purpose within the FlipitAI creator setup workflow, and understanding the difference between them helps you choose the right approach for your specific content and marketing goals.
The “Create Bounty” button is the manual route — when you click it, a detailed form opens where you describe in vivid detail exactly what you want flippers to do with your content when promoting it on social media.
Write out your instructions as clearly and specifically as possible — the tone you want, the message to convey, the type of audience to target, and the content format that works best for your brand on platforms like TikTok, Instagram, and YouTube Shorts.
The “Analyze Brand” button is the AI-powered shortcut and one of the most impressive features inside FlipitAI for creators who are short on time or unsure where to start with their campaign brief.
When you click “Analyze Brand,” you simply paste in the URL of your blog post or landing page, and the AI reads and analyzes the content at that URL before automatically generating five unique bounty ideas tailored specifically to your brand and audience.
Once the AI presents you with five ideas, you browse through them and pick the one that resonates most with your goals and the message you want flippers to carry onto social media.
After you select your preferred idea, the FlipitAI AI goes one step further and automatically fills in all the remaining necessary information for the bounty — the full description, the flipper instructions, platform suggestions, and content direction.
This AI-driven approach makes the FlipitAI creator setup process incredibly fast and removes the creative guesswork that slows creators down when trying to write effective campaign briefs from scratch.
Once everything is filled in — whether manually or by the AI — click the “Create Bounty” button below the form and the platform will display your bounty with all the details populated and ready for your final review.
Read through everything one more time to make sure the description accurately reflects what you want flippers to achieve and that the instructions are clear and easy to follow on FlipitAI.
Now scroll down to the bottom of the bounty form where you will find a category and niche selection area — this step is more important than it might look at first glance.
Selecting the right category helps FlipitAI match your bounty with flippers who have relevant knowledge, skills, and audiences in your specific niche, which means better content and better results for your campaign.
For example, if your blog covers personal finance, you want flippers who understand and create content for audiences interested in money, savings, and financial freedom — not random creators with unrelated followings.
Next, set your budget for the bounty and remember that the minimum on FlipitAI is $100, so make sure your wallet balance covers the amount you choose.
Your budget signals to flippers how much they can earn by promoting your content, and a higher budget can attract more experienced creators with larger and more engaged social media audiences.
This is where the full value of your FlipitAI creator setup becomes clear — because every dollar you invest is connected to real human creativity amplified by powerful AI tools that maximize the impact of every piece of content created for your brand.
Before the bounty can go live, you also need to upload a featured image that visually represents the bounty mission — and on FlipitAI, featured images are not optional, they are required for every single bounty.
This image is what flippers see first when they browse the assignments page and decide which bounties to apply for, so it needs to be eye-catching, relevant to your niche, and clear in communicating the theme of your content.
Think of your featured image as the cover of a book on a crowded shelf — a bold and well-designed cover pulls the right reader in, and a great bounty image pulls the right flipper toward your campaign on FlipitAI.
Free tools like Canva make it easy to create a clean and professional-looking image in minutes, even if you have no graphic design experience at all.
With your category selected, your budget set, and your featured image uploaded, you are now at the very last action of your FlipitAI creator setup — clicking the green “Create Bounty” button to post your bounty live on the platform for flippers to see and apply for.
Conclusion
Your FlipitAI creator setup is now complete, and what you have just walked through is one of the most practical and results-driven processes available to content creators who are serious about recovering and growing their traffic in 2026.
The three core steps — registering your creator account, funding your wallet, and creating your first bounty — form the complete foundation of everything you will do as a creator on FlipitAI.
Each step is simple enough to complete in under an hour, yet powerful enough to set the stage for thousands of new visitors reaching your content on a consistent and sustainable basis.
What makes FlipitAI stand out from every other traffic recovery tool on the market right now is the human element that sits at the center of the entire system.
Real people — flippers — are out there creating authentic content for your brand on their own social media accounts, and that kind of trust-based promotion is something no paid ad can fully replicate.
The AI tools built into the platform take the pressure off creators who are not sure how to brief a campaign, with the “Analyze Brand” feature alone saving hours of creative planning by generating five tailored bounty ideas from nothing more than a single URL.
Every blog post you have worked hard on, every landing page you have spent time perfecting, and every piece of content that deserves more attention has a new life waiting for it on FlipitAI.
So if your traffic has taken a hit and your content deserves better results, head straight to flipitai.io right now, complete your FlipitAI creator setup, fund your wallet, and post your first bounty today — because your 200,000 organic views are waiting on the other side of that green button, and the flippers on FlipitAI are ready to make it happen for you.
We strongly recommend that you check out our guide on how to take advantage of AI in today’s passive income economy.