
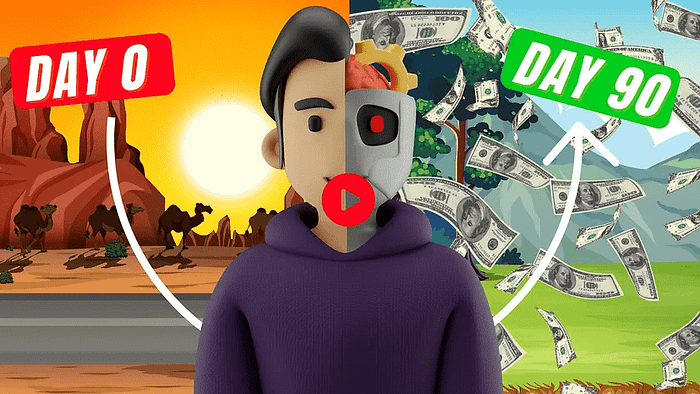
How I Use an AI Tool to Make Money Online and Earn $1,000 Per Day for Free
Hey there! I’m excited to share my journey of using an AI tool to make money online, earning over $1,000 a day alongside ChatGPT. In this blog post, I’ll guide you through a detailed, step-by-step process that I’ve implemented in my business, showing you how to schedule videos without having to edit or create them yourself. You’ll also gain access to a complete checklist of videos, a free course, and free trials for the tools I use—all without spending a dime! If you’re ready to explore how an AI tool to make money online can transform your income strategy, then let’s get started.
We strongly recommend that you check out our guide on how to take advantage of AI in today’s passive income economy.
Table of Contents
Step 1: Understanding the Process
To kick things off, let me show you the spreadsheet that I’ll be providing. This resource includes various video topics that you can begin scheduling and posting today. My team creates these videos, and I’m here to help you access them for your own use. I’m dedicated to building extensive resources that can assist you on your journey to earning money online. As we proceed, I’ll reveal how you can benefit from everything we’ve developed.
The first thing you need to do is visit the link below this post or head over to FirstAITool.com. Click on the option for the free course plus bonuses, and be sure to sign up for the 30-day free trial. This trial is essential for us to run the automated system and start generating sales. However, let me clarify—I’m not promising you’ll become a millionaire overnight. Instead, what I’m offering are templates and strategies that have been effective for me, and I believe they can work for you too!
Step 2: The Proof is in the Pudding
Now, let’s talk numbers. Here’s a snapshot of one of my income streams—$942 in monthly recurring revenue from just one product. The great news is that I have multiple affiliate tools that consistently pay me every month. Within the spreadsheet I’ll share, you’ll also find a curated list of 400 different tools you can promote. This is an incredible opportunity to pick and choose what aligns with your interests and audience.
While I’m excited to share my success, I must stress that results vary, and nothing is guaranteed. Your success will depend on the effort you put into following the steps and implementing the strategies I provide. The key takeaway here is that with the right approach, you can start seeing results. Now, let’s explore how to get started with the trial and maximize your opportunities.
Step 3: The 30-Day Trial and What You Get
The 30-day trial is a crucial step in this process. If you decide not to continue after the trial, you won’t retain the checklist and resources I’m sharing with you. My goal is to provide valuable content that can set you up for success, but it requires commitment on your part. If you follow through and maintain your subscription, you’ll keep access to everything I’m building for you.
If you find yourself not achieving the results you want within 30 days, that’s perfectly fine! You can cancel and move on to other endeavors. However, I’m confident that with dedication, you can secure your first lead and sale during this trial period. The tools and strategies I’m providing are designed to streamline your efforts and enhance your chances of success.
Step 4: The Kickoff Call
After signing up for the trial, you’ll be directed to a thank-you page. Here, you’ll find a couple of buttons, one of which is for scheduling a kickoff call. I highly recommend this call because it allows you to set up my exact snapshot. What’s a snapshot? It’s a collection of all my emails, landing pages, and automations that you can import into your account.
By not taking advantage of the kickoff call, you might miss out on valuable resources worth over $297. The best part? This call is free when you sign up for the trial. Once you complete the call, you can dive into the free course I’m building, which includes a playlist of videos guiding you through everything step-by-step.
Step 5: Accessing Bonuses and Resources
After the kickoff call, you’ll find even more bonuses awaiting you. By clicking on the “grab bonuses” option, you’ll access the spreadsheet filled with templates and automations I’m developing for you. One of the standout features is the short-form content section, where you’ll find a list of engaging video ideas that have proven successful.
The content you’ll receive is not just generic; it’s tailored to get responses. For example, videos might ask viewers to comment a specific word if they’re interested, which helps in building engagement and leads. Everything is prepared for you, including captions and hashtags, making it incredibly easy to start posting right away.
Step 6: Automating Your Posting Strategy
Now let’s talk about how we’re able to post content efficiently. We use a tool called Radar to schedule and manage our posts across various social media platforms. I’ll share a link to Radar below, where you can sign up for a free account. This tool allows us to automate our posting process and engage with our audience without the hassle of manual uploads.
With Radar, I can schedule posts to multiple profiles simultaneously. As I look at my Radar dashboard, I see the posts for the day color-coded based on their posting status. Green means the post was successful, while red indicates an issue. This visual representation helps me manage my content efficiently.
Step 7: The Benefits of Using Radar
One of the main reasons I prefer Radar over other scheduling tools is its ability to bulk automate posts. If you’re only managing a couple of profiles, other tools may suffice, but if you plan to scale and manage multiple accounts, Radar is the way to go. It enables bulk importing of posts, allowing me to schedule around 20 posts daily across 40 different profiles, which can add up to over 800 posts per day!
This level of automation translates to millions of views across all my profiles. If you’re interested in how I acquire these profiles and optimize engagement, let me know by commenting “Part Two” below, and I’ll consider making a follow-up post. However, for now, let’s focus on getting your Radar account set up.
Step 8: Connecting Your Social Media Accounts
When you first access Radar, you’ll want to connect your social media accounts. Start by going to the overview section and clicking on connect. I primarily focus on Facebook and Instagram, as they provide substantial reach for my content. If you don’t have accounts on these platforms, I encourage you to create them. The process is straightforward: for Facebook, you simply create a page, and for Instagram, you sign up for an account.
If you need guidance on setting up your pages, there are plenty of resources available online. However, I’m confident that if you’re on YouTube, you likely already have some familiarity with social media. Once your accounts are connected, you’re ready to dive into content scheduling!
Step 9: Creating Engaging Content
At this point, you might be wondering about the kind of content you should create. The beauty of what I’m offering is that you’ll have access to proven content that resonates with audiences. By leveraging the videos and templates provided, you’ll be able to craft engaging posts that encourage interaction and drive traffic.
Remember, the goal is to create content that sparks curiosity and invites your audience to engage. The more interaction your posts receive, the better they perform across social media algorithms. Utilize the captions and hashtags I provide to maximize your reach and visibility.
Step 10: Consistency is Key
As with any online business, consistency is crucial. Regularly posting content will keep your audience engaged and help you build a following. With the tools and strategies I’ve outlined, you’ll be able to maintain a steady flow of posts without feeling overwhelmed. The key is to stay organized and stick to your content calendar.
Plan ahead, and don’t be afraid to experiment with different types of content. Monitor which posts perform well and adjust your strategy accordingly. Over time, you’ll find what resonates with your audience and can refine your approach to maximize engagement and conversions.
Conclusion
In conclusion, my journey to making $1,000 a day using AI tools has been an exciting and rewarding experience. By following the steps outlined in this post, you too can tap into the potential of automated systems to generate income online. Remember to take advantage of the free resources, including the checklist, course, and tools that I’ve shared.
If you’re ready to take the plunge and start your journey to financial freedom, grab the free trial, and get started today! I’m here to support you along the way, so don’t hesitate to reach out with any questions or comments. Let’s build a successful online business together!
We strongly recommend that you check out our guide on how to take advantage of AI in today’s passive income economy.