
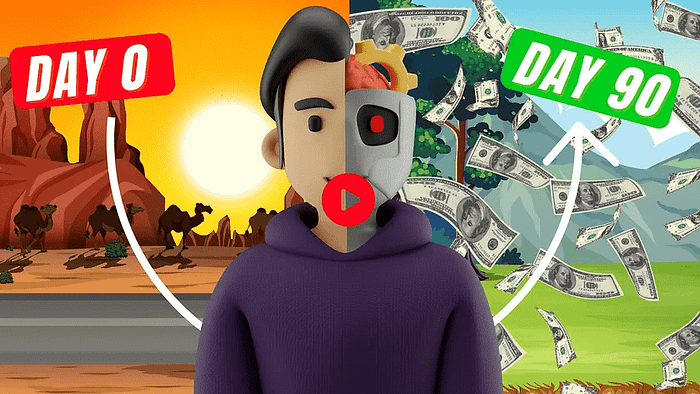
ChatGPT AI Trading Bot: Earn $2,500 Daily in Passive Income!
Are you ready to dive into the world of passive income using the ChatGPT automated trading bot?
I’ve been deeply involved with Solidity development for over five years. However, recently I ventured into creating a trading bot, and it’s been quite a journey. After investing significant time and money without much success, I decided to explore AI. The results were incredible, and today, I’m thrilled to guide you through the process of setting up your own ChatGPT automated trading bot to potentially earn $2,500 daily in passive income.
We strongly recommend that you check out our guide on how to take advantage of AI in today’s passive income economy.
Table of Contents
What is a ChatGPT Automated Trading Bot?
The ChatGPT automated trading bot is designed to monitor blockchain activity, such as new token listings and significant price changes. Its primary advantage is its speed; it can buy or sell tokens before other traders notice the opportunities. This rapid response helps capitalize on price differences, providing a profitable edge.
When I first began working with this bot, I was amazed at how it utilized sophisticated algorithms to detect market movements and execute trades. The bot’s ability to make real-time decisions and trade autonomously is a game-changer.
If you’re concerned about complexity, rest assured that setting up and using the ChatGPT automated trading bot is surprisingly straightforward. It doesn’t require any coding skills, making it accessible for everyone.
Setting Up Your ChatGPT Automated Trading Bot
To get started with your ChatGPT automated trading bot, you’ll first need to use Remix, a Web3 application for developing, compiling, deploying, and launching Solidity smart contracts. You’ll find the link to Remix in the description below. Ensure that you have the MetaMask browser extension installed and connected to the Ethereum mainnet.
If this is your first time on Remix, you might need to accept their terms. Once you’ve done that, navigate to the sidebar on the left and create a new contract under the contracts folder. Let’s name this contract BotDo.sol.
Next, you’ll need to copy the code provided by ChatGPT and paste it into the BotDo.sol file you just created. This code will serve as the foundation for our trading bot. If you don’t have direct access to ChatGPT, I’ll include the code in the description so you can easily copy it.
Compiling and Deploying Your Bot
With the code in place, it’s time to compile it. In Remix, select the Solidity version 0.6.5 under the compiler settings to match our contract. Ensure that the language is set to Solidity and the EVM version is set to default. Click on the “Compile BotDo.sol” button and wait for the process to complete.
Once compiled, navigate to the “Deploy and Run Transactions” tab in Remix. Here, select “Injected Web3” as the environment. This setting allows us to deploy the contract on the Ethereum blockchain by paying gas fees. Gas fees are the transaction fees required for deploying smart contracts on Ethereum.
I recommend setting the gas fee to high to ensure faster transaction processing. Once you confirm the deployment, wait for the transaction to be processed. You should see a confirmation indicating that your smart contract is now live on the blockchain.
Funding Your Trading Bot
After deploying your ChatGPT automated trading bot, you need to fund it with Ethereum for trading purposes. Make sure you use the correct contract address when transferring Ethereum. The amount of Ethereum you deposit will determine the size of your trades and the potential profits.
I funded my contract with one Ethereum, but you can adjust this amount based on your trading goals. The more Ethereum you deposit, the larger your trades and the greater your potential returns.
Once the transaction confirms, you can verify that the Ethereum is in the contract by checking the contract address on Etherscan. This step ensures that your funds are ready for trading.
Starting and Monitoring Your Bot
With the bot funded, the next step is to activate it. Click the “Start” button to enable the bot’s trading functionality. Set the gas speed to high and save your settings. Confirm the activation, and the bot will begin scanning the market for profitable liquidity pairs and executing transactions on your behalf.
After setting up the bot, it’s time to track its performance. I typically let the bot run for about 12 hours before checking the results. During this period, the bot should generate profits based on its trading activities.
Reviewing and Withdrawing Your Profits
After running the bot for a while, you can assess the profits it has generated. For example, after 12 hours of operation, I had earned approximately 1.31 Ethereum, which is a 31% profit. I planned to let the bot continue running for another 12 hours to further increase my earnings.
When you’re ready to withdraw your profits, simply click the “Withdraw” button. This action will stop the bot’s trading activities and return the total Ethereum, including profits, to your wallet. As with deployment, you’ll need to pay a gas fee for the withdrawal transaction.
I always set the gas fee to high for faster processing. After the transaction is confirmed, you can check your MetaMask wallet to see the updated balance.
Conclusion
Using a ChatGPT automated trading bot has proven to be a highly effective way to earn passive income. In my experience, I’ve seen impressive returns, sometimes making 3 to 6 Ethereum in a week. While profits can fluctuate, the bot provides a valuable tool for consistent earnings.
Feel free to share your results and experiences in the comments below. If you’re interested in learning more about Web3 and related technologies, consider subscribing for more insights and updates.
Thank you for reading, and I hope you find success with your ChatGPT automated trading bot.
FAQs:
Can ChatGPT Make a Trading Bot?
Yes, ChatGPT can assist in creating a trading bot by generating code and providing guidance on how to develop it. While ChatGPT itself does not build the bot or execute trades, it can help by writing and refining the code needed for a trading bot. You can use ChatGPT to generate Solidity code for smart contracts or Python scripts for trading algorithms. The bot you create with this assistance will need to be integrated into a trading platform and set up according to your specific trading strategy.
How to Automate Trading Using ChatGPT?
To automate trading using ChatGPT, follow these steps:
- Generate Code: Use ChatGPT to write the necessary code for a trading bot. This code can include algorithms for trading strategies and smart contract code for blockchain-based trading.
- Develop the Bot: Copy the code provided by ChatGPT into a development environment like Remix for smart contracts or an Integrated Development Environment (IDE) for scripts.
- Deploy and Test: Deploy the bot on your chosen trading platform. If you’re using a blockchain-based bot, you’ll need to deploy the smart contract to the Ethereum network. For other platforms, test the script with historical data to ensure it performs as expected.
- Monitor and Adjust: Once deployed, monitor the bot’s performance. You might need to make adjustments based on market conditions and trading results.
ChatGPT aids in creating and refining the code but does not handle the automation process directly.
How to Create a Forex Trading Bot with ChatGPT?
Creating a Forex trading bot with ChatGPT involves several key steps:
- Define Your Strategy: Decide on the trading strategy you want to automate. This could be based on technical indicators, price action, or other trading methodologies.
- Generate Code: Use ChatGPT to generate the necessary code for your Forex trading bot. ChatGPT can help write scripts in languages such as Python that interact with Forex trading APIs.
- Set Up the Bot: Integrate the generated code with a Forex trading platform or broker that supports automated trading. Ensure the bot can connect to the trading account and execute trades based on the strategy.
- Backtest and Deploy: Before live trading, backtest the bot using historical data to see how it would have performed. Make necessary adjustments to improve performance.
- Monitor and Optimize: Deploy the bot in a live environment and monitor its performance. Regularly review and optimize the trading strategy to adapt to changing market conditions.
Can ChatGPT Trade for Me?
ChatGPT cannot trade for you directly. It does not have the capability to execute trades or interact with trading platforms autonomously. However, it can assist in creating trading algorithms, generating code for trading bots, and providing guidance on trading strategies. Once you have a trading bot set up with the help of ChatGPT, it can perform trades based on the predefined rules and strategies you’ve configured. To fully automate trading, you’ll need to deploy the bot on a trading platform and manage its operations from there.
We strongly recommend that you check out our guide on how to take advantage of AI in today’s passive income economy.